Introducing Xano Actions
Build and share reusable visual building blocks
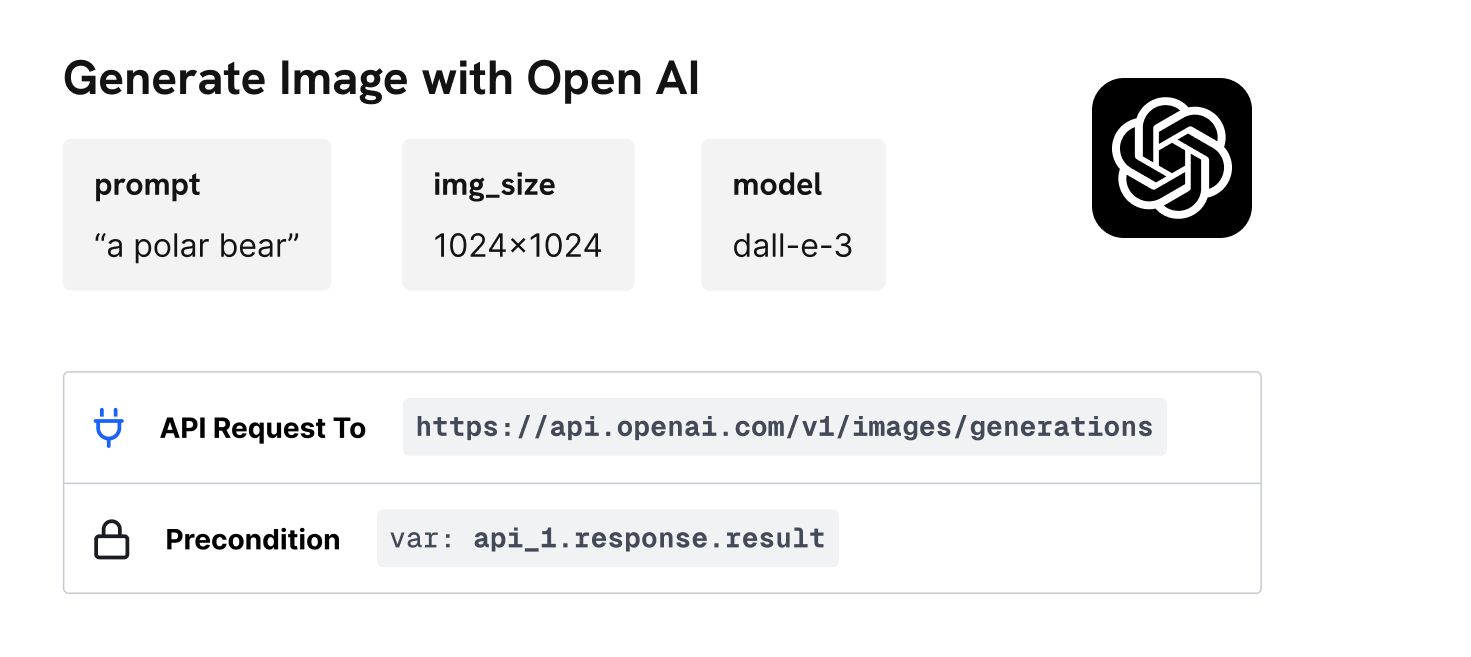
Xano Actions are reusable visual functions that serve as the building blocks for any workflow. Easily connect to various third-party services and modify the business logic to fit your unique use case.
Discover
Browse and discover actions created by the community. Test them directly without logging in.
Create
Build your own custom Actions and share them with anyone.
Install
Easily install Actions into your Xano workspace and integrate them seamlessly into your workflows.
Browse by category
Featured Actions
Function Documentation: Claude AI -> Ask a Question
Claude AI API documentation
Overview
This function sends a message request to the Claude AI API using the provided API key, prompt, and token limit. The function captures the response from the Claude API and returns it.
Inputs
claudeapikey (registry/text) Required
Description: The API key used to authenticate requests to the Claude AI API.
Example: claudeapiabc123
prompt (text) Required
Description: The prompt or message that you want to send to Claude AI as role user.
Example: What is the capital of France?
max_token (integer) Required
Description: The maximum number of tokens to be used for generating the response, Default - 1024.
Example: 1024
assistant_prompt (text) Optional
Description: The prompt or message that you want to send to Claude AI as role assistant. Default - As an enthusiastic assistant, provide clear and understandable responses.
Example: `As an enthusiastic assistant, provide clear and understandable responses
Function Stack
Try / Catch Block
Group: Claude API Request
API Request to https://api.anthropic.com/v1/messages
Purpose: Sends the prompt to the Claude AI API with the API key, prompt, assistant prompt, and token limit.
Return Value: The API response is stored as api_response.
Example:
` json
{
"model": "claude",
"message": [
{
"role": "user",
"content": "prompt"
},
{
"role": "assistant",
"content": "assistant_prompt"
}
]
}
`
Create Variable: response
Variable: var: response = var: api_response.response
Purpose: Stores the API response, including the message generated by Claude AI.
2 Error Handling (Catch)
Create Variable: response
Purpose: If the API call fails or returns an error, this block catches the error and provides an error message.
Response
The function returns the result of the Claude AI message generation, including the generated text.
Success Response
`json
{
"id": "msg_01H4x**",
"type": "message",
"role": "{role}",
"content": [
{
"type": "text",
"text": "Neural networks are a type of machine learning algorithm ..."
}
],
"model": "claude-3-opus-20240229",
"stopreason": "endturn",
"stop_sequence": null,
"usage": {
"input_tokens": 23,
"output_tokens": 219
}
}
`
Error Response
`json
{
"type": "error",
"error": {
"error": "authentication_error",
"message": "invalid x api key."
}
}
`
Example
Input
`json
{
"prompt": "{prompt}",
"maxtokens": "{maxtoken}",
"assistantprompt": "{assistantprompt}"
}
`
Output
`json
{
"id": "msg_01H4x**",
"type": "message",
"role": "{role}",
"content": [
{
"type": "text",
"text": "Neural networks are a type of machine learning algorithm ..."
}
],
"model": "claude-3-opus-20240229",
"stopreason": "endturn",
"stop_sequence": null,
"usage": {
"input_tokens": 23,
"output_tokens": 219
}
}
`
Function Documentation: Slack -> Send Channel Message
Overview
This function sends a message to a specified Slack channel using the Slack API. It uses a pre-configured Slack token from the environment to authenticate the request and sends a message to the channel based on user inputs.
Inputs
slack_token (registry|text) Required
Purpose: The Bot User OAuth Token that is automatically generated when you install an app to a Slack Workspace.
channel_id (text) Required
Purpose: The ID of the Slack channel where the message will be sent.
message (text) Required
Purpose: The content of the message to be sent to the Slack channel.
Function Stack
API Request to Slack
Endpoint: https://slack.com/api/chat.postMessage
Method: POST
Parameters:
channel: The Slack channel ID (channel_id input).
text: The message content (message input).
Headers:
Authorization: Bearer slack_token
Purpose: Sends a message to the specified Slack channel using the Slack API.
Create Variable: response
Variable: var: response = var: api_response.response.result
Purpose: Stores the response from the Slack API after sending the message.
Response
The function returns the response from Slack, which contains information about the message and its status.
Success Response
`json
{
{
"ok": true,
"channel": "C07983**",
"ts": "1728480204.015929",
"message": {
"user": "U06UJRZ**",
"type": "message",
.
.
.
}
}
}
`
Error response
`json
{
"ok": false,
"error": "channelnotfound"
}
`
Example
Input
`json
{
"channel_id": "C01A*",
"message": "Hello, Slack channel!"
}
`
Output
`json
{
{
"ok": true,
"channel": "C07983**",
"ts": "1728480204.015929",
"message": {
"user": "U06UJRZ**",
"type": "message",
.
.
.
}
}
}
`
Function Documentation: QuickBooks -> Create Payment
Quickbooks API documentation
Overview
This function creates a payment in QuickBooks by making an API call. It uses the QuickBooks API with the provided realm ID, amount, and consumer reference.
This action works on production environment only, for sandbox environment refer documentation at https://developer.intuit.com/app/developer/qbo/docs/api/accounting/all-entities/payment#create-a-payment.
Inputs
quickbooksrealmid (registry/text) Required
Description: The QuickBooks realm ID associated with the account.
Example: quickbooksrealmabc123
amount (decimal) Required
Description: The amount of the payment to be created.
Example: 100.50
consumer_ref (integer) Required
Description: A reference number associated with the consumer.
Example: 12345
quickbooksapitoken (registry|text) Required
Description: The JWT token used to authenticate requests to the quickbooks API.
Example: xkeysib-...
Function Stack
Try / Catch Block
QuickBooks API Call
API Request to https://quickbooks.api.intuit.com/v3/company/{quickbooksrealmid}/payment
Purpose: Sends a payment creation request to QuickBooks using the realm ID, amount, and consumer reference.
Return Value: The API response is stored as response.
Response Variable
Variable: var: response = var: quickbooksapiresponse.response
Purpose: Captures the response returned by the QuickBooks API.
Error Handling (Catch)
Create Variable: response
Purpose: Catches and handles any errors that occur during the QuickBooks API call and logs the error message.
Response
The function returns the result of the QuickBooks payment creation.
Success Response
`json
{
"Payment": {
"CustomerRef": {
"value": "20",
"name": "Red Rock Diner"
},
"DepositToAccountRef": {
"value": "4"
},
"TotalAmt": 25,
"UnappliedAmt": 25,
"ProcessPayment": false,
"domain": "QBO",
"sparse": false,
"Id": "150",
"SyncToken": "0",
"MetaData": {
"CreateTime": "2024-10-11T07:17:33-07:00",
"LastUpdatedTime": "2024-10-11T07:17:33-07:00"
},
"TxnDate": "2024-10-11",
"CurrencyRef": {
"value": "USD",
"name": "United States Dollar"
}
},
"time": "2024-10-11T07:17:32.610-07:00"
}
`
Error Response
`json
{
"type": "error",
"error": {
"code": "paymentcreationfailed",
"message": "Failed to create the payment due to an invalid realm ID."
}
}
`
Example
Input
`json
{
"quickbooksrealmid": "{quickbooksrealmid}",
"amount": "{amount}",
"consumerref": "{consumerref}"
}
`
Output
`json
{
"Payment": {
"CustomerRef": {
"value": "20",
"name": "Red Rock Diner"
},
"DepositToAccountRef": {
"value": "4"
},
"TotalAmt": 25,
"UnappliedAmt": 25,
"ProcessPayment": false,
"domain": "QBO",
"sparse": false,
"Id": "150",
"SyncToken": "0",
"MetaData": {
"CreateTime": "2024-10-11T07:17:33-07:00",
"LastUpdatedTime": "2024-10-11T07:17:33-07:00"
},
"TxnDate": "2024-10-11",
"CurrencyRef": {
"value": "USD",
"name": "United States Dollar"
}
},
"time": "2024-10-11T07:17:32.610-07:00"
}
`
HubSpot → List Deals
Overview
This function retrieves a list of deals from HubSpot. It involves setting environment variables, preparing the request with optional parameters, and handling the response from the HubSpot API.
Inputs
hubspotapikey (registry|text) Required Sensitive data
Description: The API key for your HubSpot account.
after (integer)
Description: The paging cursor to get the next set of deals.
limit (integer)
Description: The maximum number of deals to retrieve.
properties (text[])
Description: A list of deal properties to retrieve.
propertieswithhistory (text[])
Description: A list of deal properties with their history to retrieve.
Function Stack
HubSpot API Request
API Request to https://api.hubapi.com/crm/v3/objects/deals
Purpose: Sends a GET request to retrieve deals from HubSpot.
Parameters: Includes optional after cursor, limit, and specified properties.
Preconditions
Precondition: hubspot_api.response.status == 200
Purpose: Ensures successful retrieval of deals with HTTP status code 200.
Response
The function returns the result from the HubSpot API response.
Success response
`json
{
"deal_id": 22413038713,
"properties": [],
"propertieswithhistory": [
"closedwonreason"
]
}
`
Error response
`json
{
"message": "Uh oh! Hubspot returned with an error: Authentication credentials not found. This API supports OAuth 2.0 authentication and you can find more details at https://developers.hubspot.com/docs/methods/auth/oauth-overview"
}
`
Example
Input
`json
{
"after": "22393633108",
"limit": 10,
"properties": [],
"propertieswithhistory": [
"dealname"
]
}
`
Output
`json
[
{
"id": "22393633108",
.
.
.
},
.
.
]
`
John Carmack’s fast inverse square root function is a famous algorithm used in computer graphics, particularly in 3D rendering, to compute the inverse square root of a number quickly.
It was notably used in the Quake III Arena game engine to speed up computations related to lighting, shading, and physics. The function approximates the value of 1/sqrt(x) very efficiently, significantly faster than the traditional method of calculating a square root followed by division.
Function Documentation: HubSpot → Create Contact
Overview
This function creates a new contact in HubSpot using specified input parameters. It involves setting environment variables, preparing the request, and handling the response.
Inputs
hubspotapikey (registry|text) Required Sensitive data
Description: The API key for your HubSpot account.
first_name (text)
Description: The first name of the contact.
last_name (text)
Description: The last name of the contact.
email (text)
Description: The email address of the contact.
company (text)
Description: The company associated with the contact.
lead_status (enum)
Description: The lead status of the contact.
Options:
NEW
OPEN
IN_PROGRESS
OPEN_DEAL
UNQUALIFIED
ATTEMPTEDTOCONTACT
CONNECTED
BAD_TIMING
contact_owner (integer)
Description: The owner of the contact.
phone_number (text)
Description: The phone number of the contact.
additional_properties (json)
Description: Additional properties in JSON format.
Schema:
`json
{
"additionalProp1": "string",
"additionalProp2": "string",
"additionalProp3": "string"
}
`
Function Stack
Set Properties Object
Create Variable: properties_object
Purpose: Sets properties object from input: additional_properties.
HubSpot API Request
API Request to https://api.hubapi.com/crm/v3/objects/contacts
Purpose: Sends a POST request to create a new contact in HubSpot.
Preconditions
Precondition: hubspot_api.response.status == 201
Purpose: Ensures successful creation of the contact with HTTP status code 201.
Response
The function returns the result from the HubSpot API response.
Success response
`json
{
"id": "12345678",
"properties": {
"company": "Xano",
.
.
.
},
"createdAt": "2024-09-23T13:26:23.352Z",
"updatedAt": "2024-09-23T13:26:23.352Z",
"archived": false
}
`
Error message
`json
{
"message":"Uh oh! Hubspot returned with an error: Property values were not valid: [{\"isValid\":false,\"message\":\"Property \\\"prop2\\\" does not exist\",\"error\":\"PROPERTYDOESNTEXIST\",\"name\":\"prop2\",\"localizedErrorMessage\":\"Property \\\"prop2\\\" does not exist\",\"portalId\":47373842},{\"isValid\":false,\"message\":\"Property \\\"prop1\\\" does not exist\",\"error\":\"PROPERTYDOESNTEXIST\",\"name\":\"prop1\",\"localizedErrorMessage\":\"Property \\\"prop1\\\" does not exist\",\"portalId\":47373842}]"
}
`
Example
Input
`json
{
"first_name": "Unico",
"last_name": "Connect",
"email": "imagine@xano.com",
"company": "UC",
"lead_status": "OPEN",
"contact_owner": 0,
"phone_number": "123456",
"customer_Id": 0,
"additional_properties":
{
"mobilephone":"123456"
}
}
`
Output
`json
{
"id": "123456789",
"properties": {
"company": "UC",
"createdate": "2024-09-23T13:30:40.386Z",
"email": "imagine@xano.com",
"firstname": "Unico",
"hsallcontact_vids": "60968500829",
"hscurrentlyenrolledinprospecting_agent": "false",
"hsemaildomain": "xano.com",
"hsiscontact": "true",
"hsisunworked": "true",
"hsleadstatus": "OPEN",
"hslifecyclestagelead_date": "2024-09-23T13:30:40.386Z",
"hsmarketablestatus": "false",
"hsmarketableuntil_renewal": "false",
"hsmembershiphasaccessedprivate_content": "0",
"hsobjectid": "60968500829",
"hsobjectsource": "INTEGRATION",
"hsobjectsource_id": "3898752",
"hsobjectsource_label": "INTEGRATION",
"hs_pipeline": "contacts-lifecycle-pipeline",
"hsregisteredmember": "0",
"hssearchablecalculatedmobilenumber": "123456",
"hssearchablecalculatedphonenumber": "123456",
"lastmodifieddate": "2024-09-23T13:30:40.386Z",
"lastname": "Connect",
"lifecyclestage": "lead",
"mobilephone": "123456",
"phone": "123456"
},
"createdAt": "2024-09-23T13:30:40.386Z",
"updatedAt": "2024-09-23T13:30:40.386Z",
"archived": false
}
`
Postmark → Send Single Email
Overview
This function allows you to send a single email using the Postmark API. It requires parameters such as the sender email address, recipient email address, subject, body (in either HTML or plain text format), and optionally a template ID.
Inputs
postmarkbaseurl (registry|text) Required
Description: The base url for calling the Postmark API (e.g., "https://api.postmarkapp.com/").
postmarkservertoken (registry|text) Required Sensitive data
Description: This is the Postmark Server API Token (e.g., "14g8dce4-7054-47c9-a18a-2107e5cf4e41"). This is needed for authentication on endpoints.
from_email (text) Required
Description: The email address of the sender.
Example: noreply@yourdomain.com
to_email (text) Required
Description: The email address of the recipient.
Example: user@example.com
subject (text) Required
Description: The subject line of the email.
Example: Welcome to Our Service
html_body (text) Optional
Description: The HTML content of the email message. If provided, it takes precedence over text_body.
Example: <h1>Hello, John!</h1><p>Thank you for signing up.</p>
text_body (text) Optional
Description: The plain text content of the email message. If provided and html_body is not, it will be used.
Example: Hello, John! Thank you for signing up.
Function Stack
Create Variable
Create Variable: api_url
Purpose: Constructs the API URL for sending single emails.
Create Variable
Create Variable: api_token
Purpose: Stores the Postmark API token.
Precondition Logic
Precondition: from_email should not exceed 255 characters.
Purpose: Ensures the sender email address is not too long.
Precondition: from_email is a valid email format.
Purpose: Ensures the sender email address is formatted correctly.
Precondition: to_email is a valid email format.
Purpose: Ensures recipient email address is formatted correctly.
Precondition: to_email should not exceed 50 email addresses.
Purpose: Limits the number of recipients to avoid batch size issues.
Precondition: Either textbody or htmlbody (or both) are provided.
Purpose: Ensures that at least one form of email content is available.
Precondition: html_body is a valid HTML format.
Purpose: Ensures that if HTML is provided, it is well-formed.
API Request
API Request to: https://api.postmarkapp.com/email
Purpose: Sends a POST request to the api_url with the following payload:
`json
{
"from_email": "noreply@yourdomain.com",
"to_email": "user@example.com",
"subject": "Welcome to Our Service",
"html_body": "<h1>Hello, John!</h1><p>Thank you for signing up.</p>", // Optional
"text_body": "Hello, John! Thank you for signing up." // Optional
}
`
Create Variable
Create Variable: postmark_response
Purpose: Stores the response from the Postmark API.
Create Variable
Create Variable: response
Purpose: Creates a response object containing the result from the Postmark API.
Conditional Check
Conditional: Checks if the response status is 200 and the error code is 0.
If True: Updates the response object to indicate success.
If False: Updates the response object to indicate an error.
Response
The function returns either a success message or an error message depending on the outcome.
Success Response
`json
{
"To": "user@example.com",
"SubmittedAt": "2024-10-07T14:33:15.817Z",
"MessageID": "message-id-1",
"ErrorCode": 0,
"Message": "OK"
}
`
Error Response
`json
{
"ErrorCode": 401,
"Message": "Unauthorized: Missing or incorrect API key."
}
`
Example
Input
`json
{
"from_email": "noreply@yourdomain.com",
"to_email": "user@example.com",
"subject": "Welcome to Our Service",
"html_body": "<h1>Hello, John!</h1><p>Thank you for signing up.</p>",
"text_body": "Hello, John! Thank you for signing up."
}
`
Output
`json
{
"To": "user@example.com",
"SubmittedAt": "2024-10-07T14:33:15.817Z",
"MessageID": "message-id-1",
"ErrorCode": 0,
"Message": "OK"
}
`
Function Documentation: Brevo → Send Single Email
Brevo API documentation
Overview
This function sends a single email using the Brevo (Sendinblue) API with HTML content. It requires inputs such as the API key, sender and receiver details, email content, and subject. The function validates and processes the input before making a request to the Brevo API.
Inputs
brevoapikey (registry/text) Required
Description: API key for authenticating with Brevo API.
Example: xkeysib-...
from (object) Required
Description: The sender's email address.
Example: sender@example.com
to (object) Required
Description: The recipient's email address.
Example: receiver@example.com
message_html (text) Required
Description: The HTML content to be sent.
Example: <html><body><h1>Hello</h1></body></html>
subject (text) Required
Description: The subject of the email.
Example: Welcome to our service!
Function Stack
Try / Catch Block
Precondition: Check Valid HTML Content
Description: Ensures the HTML content for the email is valid before proceeding.
API Request to Sendinblue
API Request to https://api.brevo.com/v3/smtp/email
Purpose: Sends the email using the Brevo (Sendinblue) API.
Return Value: The API response is stored as api_response.
Create Variable: response
Variable: var: response = var: api_response.response.result
Purpose: Stores the API response for the SMS send operation.
2 Error Handling (Catch)
Create Variable: response
Purpose: If the API call fails or returns an error, this block catches the error and provides an error message.
Response
The function returns the result of the email send operation, including status and any relevant messages.
Success Response
`json
{
"messageId": "<202410100.1236169*@smtp-relay.mailin.fr>",
}
`
Error response
`json
{
"message": "Key not found",
"code": "unauthorized"
}
`
Example
Input
`json
{
"from":{
"from_name":"John",
"from_email":"sohansakhare**@gmail.com"
},
"to":{
"to_name":"David",
"to_email":"sajankumar.*@unicoco*.com"
},
"email_html":"<html><head></head><body><p>Hello world</p></body></html>",
"subject":"abc"
}
`
Output
`json
{
"messageId": "<202410100.1236169*@smtp-relay.mailin.fr>"
}
`
Function Documentation: xAI -> Create a Chat Completion
xAI API documentation
Overview
This function generates a completion using the xAI API based on a user-provided request. It requires parameters such as the model & prompt text. The function validates environment variables and conditions before making an API request and processing the response.
Inputs
xaiapikey (registry|text) Required Sensitive data
Description: The API key for your xAI account.
model (enum) Required
Description: Specifies the model to be used for generating the completion.
Options:
Available models will be specified by xAI
message (text) Required
Description: The input prompt that will be sent to the xAI API for generating the completion.
system (text) Required
Description: Initial instructions that shape the AI's behavior, role, and response style. Sets the context and guidelines for how the AI should interact throughout the conversation on task.
Function Stack
xAI API Request
API Request to https://api.x.ai/v1/completions
Purpose: Sends a request to the xAI API using the specified model and prompt.
Precondition: xaiapiresponse.status == 200
Purpose: Confirms that the API request was successful (HTTP status code 200).
xAI API Response
Create Variable: response
Purpose: Stores the response from the xAI API.
Response
The function returns the generated completion in a structured format
Success Response
Response provided as a string.
Error Response
`json
{
"error": {
"message": "Invalid API key provided",
"type": "invalidrequesterror"
}
}
`
Example
Input
`json
{
"model": "grok-beta",
"prompt": "What is Obama's height?"
}
`
Response
`
"Barack Obama is 6 feet 1 inch tall (185 cm)."
`
Postmark → Send Batch Emails
Overview
This function allows you to send a batch of emails using the Postmark API. It requires parameters such as the sender email address, recipient email addresses, subject, body, and optionally a template ID.
Inputs
postmarkbaseurl (registry|text) Required
Description: The base url for calling the Postmark API (e.g., "https://api.postmarkapp.com/").
postmarkservertoken (registry|text) Required Sensitive data
Description: This is the Postmark Server API Token (e.g., "14g8dce4-7054-47c9-a18a-2107e5cf4e41"). This is needed for authentication on endpoints.
message (Object[]) Required
Description: An Object of message, each containing the following properties:
from_email (text) Required
Description: The email address of the sender.
to_email (text) Required
Description: The email address of the recipient.
subject (text) Required
Description: The subject line of the email.
html_body (text) Optional
Description: The HTML content of the email message. If provided, it takes precedence over text_body.
text_body (text) Optional
Description: The plain text content of the email message. If provided and html_body is not, it will be used.
Function Stack
Create Variable: api_url
Purpose: Constructs the API URL for sending batch emails.
Create Variable: api_token
Purpose: Stores the Postmark API token.
Create Variable: messages_payload
Purpose: Initializes an empty array to store the Postmark formatted messages.
Precondition
Precondition: from_email should not exceed 255 characters.
Purpose: Ensures the sender email address is not too long.
Precondition: from_email is a valid email format.
Purpose: Ensures the sender email address is formatted correctly.
Precondition: to_email is a valid email format and allows comma-separated values.
Purpose: Ensures recipient email addresses are formatted correctly and the list is not too long.
Precondition: to_email should not exceed 50 email addresses.
Purpose: Limits the number of recipients per batch.
Precondition: textbody or htmlbody != null
Purpose: Either textbody or htmlbody (or both) are provided.
Precondition: html_body is a valid HTML format
Purpose: html_body is a valid HTML format
Convert Message: Postmark Format
Purpose: Create a Postmark message object with the required fields, ensuring that to_email is converted to an array if it's a comma-separated list.
Update Variable: Increment message_counter.
Purpose: Update message_counter.
API Request
Sends a POST request to the apiurl with the messagespayload as the request body.
Create Variable: postmark_response
Purpose: Stores the response from the Postmark API.
7 Create Variable: response
Purpose: Creates a response object with the result from the Postmark API.
Response
The function returns a success message or an error message depending on the outcome.
Success Response
`json
{
"To": "user1@example.com",
"SubmittedAt": "2024-10-07T14:33:15.817Z",
"MessageID": "message-id-1",
"ErrorCode": 0,
"Message": "OK"
},
{
"To": "user2@example.com",
"SubmittedAt": "2024-10-07T14:33:15.817Z",
"MessageID": "message-id-2",
"ErrorCode": 0,
"Message": "OK"
}
`
Error Response
`json
{
"ErrorCode": 401,
"Message": "Unauthorized: Missing or incorrect API key."
}
`
Example
Input
`json
{
"message": [
{
"from_email": "sender@example.com",
"to_email": "recipient1@example.com,recipient2@example.com",
"subject": "Welcome to Our Service",
"html_body": "<h1>Welcome!</h1><p>Thank you for joining our service.</p>",
"text_body": "Welcome! Thank you for joining our service."
},
{
"from_email": "admin@example.com",
"to_email": "recipient3@example.com",
"subject": "Important Update",
"html_body": "<h1>Update</h1><p>Here’s an important update for you.</p>"
}
]
}
`
Output
`json
[
{
"To": "recipient1@example.com",
"SubmittedAt": "2024-10-07T14:33:15.817Z",
"MessageID": "message-id-1",
"ErrorCode": 0,
"Message": "OK"
},
{
"To": "recipient2@example.com",
"SubmittedAt": "2024-10-07T14:33:15.817Z",
"MessageID": "message-id-2",
"ErrorCode": 0,
"Message": "OK"
},
{
"To": "recipient3@example.com",
"SubmittedAt": "2024-10-07T14:33:15.817Z",
"MessageID": "message-id-3",
"ErrorCode": 0,
"Message": "OK"
}
]
`
WhatsApp API → Send Message via WhatsApp
Overview
This function allows you to send a WhatsApp message using the WhatsApp API by calling the Facebook Graph API. You can specify the recipient's phone number and the message content, and the function will handle sending the message to the recipient.
Inputs
whatsappaccountid (registry/text) Required
Description: The WhatsApp account ID associated with the message-sending feature.
Example: 1234567890
whatsapp_token (registry/text) Required
Description: The token or authentication key to authenticate the API request to WhatsApp.
Example: EAAkfsidlfjsdflslkn...
to_number (text) Required
Description: The recipient's phone number in international format (without '+' or '00'). For example, a US phone number would be entered as 11234567890.
Example: 11234567890
message (text) Required
Description: The content of the message that will be sent to the recipient.
Example: Hello, this is a test message from our service!
version (text) Required
Description: The API version to use when making the request to the WhatsApp Graph API.
Example: v2.8
Function Stack
API Request to WhatsApp API
API Request To: https://graph.facebook.com/{version}/{whatsappaccountid}/messages
Method: POST
Headers:
Authorization: Bearer {whatsapp_token}
Body:
`json
{
"messaging_product" : "whatsapp",
"recipient_type" : "individual",
"to": "+9183277*",
"type": "text",
"text": {
"preview_url": false,
"body": "Hello World"
}
}
`
Purpose: Sends a POST request to the WhatsApp API with the recipient's phone number and the message to be delivered.
Create Variable: response
Variable: var: response = var: api_response.response.result
Purpose: Stores the response from the Whatsapp API after sending the message.
Response
The function returns the result from the WhatsApp API.
Success Response
`json
{
"messaging_product": "whatsapp",
"contacts": [
{
"input": "+9183277*",
"wa_id": "91832770*"
}
],
"messages": [
{
"id": "wamid.HBgMOTE4MzI3N**"
}
]
}
`
Error response
`json
{
"success": false,
"error_code": 401,
"message": "Unauthorized: Invalid or missing API token."
}
`
Example
Input
`json
{
"messaging_product" : "whatsapp",
"recipient_type" : "individual",
"to": "+9183277*",
"type": "text",
"text": {
"preview_url": false,
"body": "Hello World"
}
}
`
Output
`json
{
"messaging_product": "whatsapp",
"contacts": [
{
"input": "+918327*",
"wa_id": "9183277*"
}
],
"messages": [
{
"id": "wamid.HBgMOTE4MzI3N**"
}
]
}
`
Function Documentation: HubSpot → Create Deal
Overview
This function creates a new deal in HubSpot using specified input parameters. It involves setting environment variables, preparing the request with deal details, and handling the response from the HubSpot API.
Inputs
hubspotapikey (registry|text) Required Sensitive data
Description: The API key for your HubSpot account.
name (text)
Description: The name of the deal.
deal_stage (enum)
Description: The stage of the deal.
Options
appointmentscheduled
qualifiedtobuy
presentationscheduled
decisionmakerboughtin
contractsent
closedwon
closedlost
close_date (timestamp)
Description: The expected close date of the deal. A unix timestamp in milliseconds.
owner_id (integer)
Description: The ID of the owner of the deal.
amount (decimal)
Description: The amount associated with the deal.
additional_properties (json)
Description: Additional properties in JSON format for the deal.
Function Stack
Create Properties Object
Create Variable: properties_obj
Purpose: Sets properties object from input: additional_properties and other input fields.
HubSpot API Request
API Request to https://api.hubapi.com/crm/v3/objects/deals
Purpose: Sends a POST request to create a new deal in HubSpot.
Preconditions
Precondition: hubspot_api.response.status == 201
Purpose: Ensures successful creation of the deal with HTTP status code 201.
Response
The function returns the result from the HubSpot API response.
Success response
`json
{
"id": "22658811284",
"properties": {
"createdate": "2024-09-26T11:47:07.243Z",
.
.
.
},
"createdAt": "2024-09-26T11:47:07.243Z",
"updatedAt": "2024-09-26T11:47:07.243Z",
"archived": false
}
`
Error response
`json
{
"message": "Uh oh! Hubspot returned with an error: Authentication credentials not found. This API supports OAuth 2.0 authentication and you can find more details at https://developers.hubspot.com/docs/methods/auth/oauth-overview"
}
`
Example
Input
`json
{
"name": "Xano Actions",
"deal_stage": "qualifiedtobuy",
"close_date": 1729771263000,
"owner_id": 0,
"amount": 1456.55,
"additional_properties":
{
"closedwonreason": "Quick deployment"
}
}
`
Output
`json
{
"id": "22651426560",
"properties": {
"amount": "1456.55",
.
.
.
},
"createdAt": "2024-09-26T12:02:50.213Z",
"updatedAt": "2024-09-26T12:02:50.213Z",
"archived": false
}
`
The array paginator is a function that divides a large array into smaller chunks, allowing you to display only a specific portion (or “page”) of the array at a time. It takes in parameters like the number of items you want per page (per_page) and the current page (page), and returns a portion of the array corresponding to that page.
This is useful if you are working with Redis lists, need to break apart a large dataset into smaller chunks for loops and more.
In addition to the paginated items, it also calculates useful metadata, such as:
• The total number of items in the array.
• The total number of pages.
• The current page.
• The next page (if there is one).
• The previous page (if there is one).
This allows for easier navigation through large datasets by breaking them up into smaller, manageable “pages.”
Function Documentation: OpenAI -> Create a Chat Completion
OpenAI API documentation
Overview
This function generates a chat completion using the OpenAI API based on a user-provided input text. It requires parameters such as the model & input message. The function validates environment variables and conditions before making an API request and processing the response.
Inputs
openaiapikey (registry|text) Required Sensitive data
Description: The API key for your OpenAI account.
model (enum) Required
Description: Specifies the model to be used for generating the chat completion.
Options:
gpt-4o-mini (default)
gpt-4o
message (text) Required
Description: The input message or prompt that will be sent to the OpenAI API for generating the chat completion.
Function Stack
OpenAI API Request
API Request to https://api.openai.com
Purpose: Sends a request to the OpenAI API using the specified model and message.
Precondition: openaiapiresponse.status == 200
Purpose: Confirms that the API request was successful (HTTP status code 200).
OpenAI API Response
Create Variable: response
Purpose: Stores the response from the OpenAI API.
Response
The function returns the generated chat completion
Success response
`json
{"Barack Obama is 6 feet 1 inch tall (185 cm)."}
`
Error response
`json
{
"message": "Incorrect API key provided: ssk-None***GQPD. You can find your API key at https://platform.openai.com/account/api-keys."
}
`
Example
Input
`json
{ "model": "gpt-4o-mini", "message": "What is Obama's height?" }
`
Response
`json
{"Barack Obama is 6 feet 1 inch tall (185 cm)."}
`
Function Documentation: HubSpot → List Contacts
Overview
This function retrieves a list of contacts from HubSpot. It involves setting environment variables, preparing the request with optional parameters, and handling the response from the HubSpot API.
Inputs
hubspotapikey (registry|text) Required Sensitive data
Description: The API key for your HubSpot account.
after (integer)
Description: The paging cursor to get the next set of contacts.
properties (text[])
Description: A list of contact properties to retrieve.
Function Stack
HubSpot API Request
API Request to https://api.hubapi.com/crm/v3/objects/contacts
Purpose: Sends a GET request to retrieve contacts from HubSpot.
Parameters: Includes archived=false, optional after cursor, and specified properties.
Preconditions
Precondition: hubspot_api.response.status == 200
Purpose: Ensures successful retrieval of contacts with HTTP status code 200.
Response
The function returns the result from the HubSpot API response.
Success response
`json
{
"results": [
{
"id": "123456789",
"properties": {
"createdate": "2024-09-12T11:36:05.267Z",
"hsmarketablestatus": "false",
"hsobjectid": "123456789",
"lastmodifieddate": "2024-09-12T11:36:22.982Z"
},
"createdAt": "2024-09-12T11:36:05.267Z",
"updatedAt": "2024-09-12T11:36:22.982Z",
"archived": false
},
.
.
.
],
"paging": {
"next": {
"after": "123456789",
"link": "https://api.hubapi.com/crm/v3/objects/contacts/?archived=false&after=123456789&properties=hsmarketablestatus"
}
}
}
`
Error response
`json
{
"message": "Uh oh! Hubspot returned with an error: Authentication credentials not found. This API supports OAuth 2.0 authentication and you can find more details at https://developers.hubspot.com/docs/methods/auth/oauth-overview"
}
`
Example
Input
`json
{
"after": 0,
"properties": [
"hsmarketablestatus"
]
}
`
Output
`json
{
"results": [
{
"id": "12345",
"properties": {
"createdate": "2024-09-12T11:36:05.267Z",
"hsmarketablestatus": "false",
"hsobjectid": "57309372733",
"lastmodifieddate": "2024-09-12T11:36:22.982Z"
},
"createdAt": "2024-09-12T11:36:05.267Z",
"updatedAt": "2024-09-12T11:36:22.982Z",
"archived": false
},
.
.
.
],
"paging": {
"next": {
"after": "1234",
"link": "https://api.hubapi.com/crm/v3/objects/contacts/?archived=false&after=12345&properties=hsmarketablestatus"
}
}
}
`